'Fairy garden Gate' mixed media mini album
Hello crafty friends!
Today's post is my DT post for Itsy bitsy blog..and I have made a 'fairy garden Gate' mini album with mixed media effects.
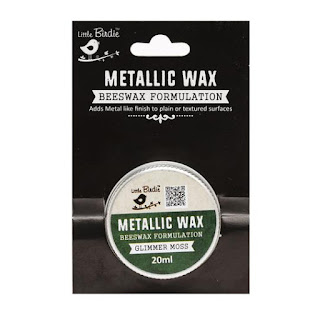
This month Itsy bitsy store have introduced metallic waxes and new paper packs .. which I tried to use in my project....I must say these waxes are amazing n super easy to use. You can see beautiful wax color effect on my texture base.. As usual this project is also have picture heavy post so let's directly start with that with no further delay.....all the supplies I have used you can check in my supply list below..


 First I have cut 2 piece of cardstock (350-400 GSM) in 5.25x 7.25"..
 Then arranged big size Popsicle craft sticks...( See photo)
 In each piece of CS I stucked 6 pieces of popsicle sticks ..if any extra black CS left..then remove it by cutting with scissors.
 Stuck two pieces of popsicle sticks in horizontal way as you can see in picture to give gate look. Now front n back part of our album or two gate parts are ready....so let's start with album part...here you can use any ready dairy,or book or you can make any typy of album binding in your style..today I tried very easy binding style....
 Cut 10 picece of CS in 4.5"x7.5" if you want more pages you can cut more..for hinges I have cut 12 pieces of same colour CS in 1.5"x7.5"
 Now take 1.5"x7.5" CS n score on short side at .75". On all 12 pieces.
 Now give little angle cut on both the sides so that when we join hinges with our pages ..corner doesn't show out....( See picture)

Now let's do the Mixed media part and decoration of our front cover page and back page.
 Now take the two gate pieces we have made earlier
 I have applied two in one texture paste and with toothpick gave the woodgrain effect..it's very easy to do..
 Here you can see the complete woodgrain texture effect..let it dry for some time..then I have used Little birdie fiber paste and texture stones in few places with heavy gel medium...after completely drying up..I have applied two coats of black gesso .


 Here is the complete look.
 Then with fingers I have applied metallic waxes..first applied blue,then silver..
 Here you can see the beautiful wax effect on that wood grain texture..
 Complete look you can see here...I did same for both front n back part.

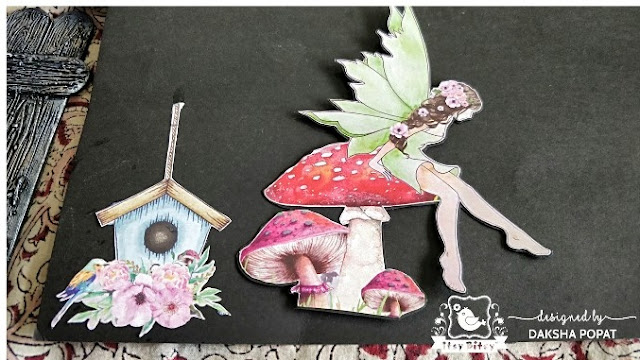 Now I selected few images from little birdie new launched paper pack..'fairy sparkle' and did fussy cutting..I wanted black edges on my images so I stuck all required images on a black cardstock and did fussy cutting again leaving little black edges to my images..you can see that in picture below

 Then I have arranged everything on the front part of the gate base...and when I was happy with the arrangement I stucked everything using double sided foam tape and hot glue gun..
 Then using heavy gel medium I stuck both front and back part on to my album .. once it dried I started with other steps...first thing I noticed that in my images there are green and pink colours..and I have used blue n silver( actually planned to use other image with blue colour but later changed to this) so I decided to give touch of green n pink on to my base ...so I have used green metallic wax n little touch of metallic pink colour... You can see that in picture below..it really changes the background...🙂


Today's post is my DT post for Itsy bitsy blog..and I have made a 'fairy garden Gate' mini album with mixed media effects.
This month Itsy bitsy store have introduced metallic waxes and new paper packs .. which I tried to use in my project....I must say these waxes are amazing n super easy to use. You can see beautiful wax color effect on my texture base.. As usual this project is also have picture heavy post so let's directly start with that with no further delay.....all the supplies I have used you can check in my supply list below..


let's start with step by step instructions:


Now stick two pages of our CS 5.5"x7.5" on two sides of our hinge..that way keep sticking all pages one by one with hinges..
 Once all 10 pages get stuck..then stick one hinge pieces on each front n back page also..
 Now take a piece of black card stock in (350-400 GSM)..in 7.75"x 12" and on long side score at 5.75" from both sides..in middle you will get 1/2" for hinges part.
 Now stick front n back hinges with front n back part of this black cardstock.( See picture)
 Here don't stick glue in middle 1/2" part..only on the hinges on first n last page and that only stuck with the front n back part of our album cover.

Our album cover with 10 pages ready.. inside pages you can decorate as per your choice....


Now let's do the Mixed media part and decoration of our front cover page and back page.


Now to give a gate look I have used few metal emblisments using E6000..


Here is the final look after adding few more emblishments , glossy accent and glitter...I have used Little birdie flowers in two corners , highlighted with white chalk paint and used two small sentiments from my stash..as I did not want any thing big to remove focus from my beautifully textured gate😁
Thank you so much..for stopping by..I tried to explain each steps clearly with pictures but still if you have any queries plz feel free to ask in comment box..
Love n hugs
Daksha


Comments
Post a Comment