Note-card /paper Holder in LOVE theme - with craft cement
Hello crafty friends!
Today I am sharing cement craft project in love theme 😊❤️. When I was told to work on cement craft for my DT project..I was little worried ! what to do with cement?..n how it will work?..but once I got the craft cement box in my hand n watching itsybitsy craft cement video ...ideas started pouring in my head..and then it was so difficult to stop myself😀.. Iam telling you in advance it's very addictive..you just can't stop playing with that😁 l almost used 3 cement boxes.
Here in my project I have used silicon moulds, since I have in many designs as I do soap making n all...but you can use any plastic containers, cartoon boxes, glass bottle etc for your base..just you have to keep your eyes for different shapes n bases...
If you want to see how to use craft cement video..HERE is the link.
Now here is my project..since it's a valentine's week so I am sharing love theme cement project..
NOTE CARD HOLDER IN LOVE THEME:
It's a paper,or note card holder in love theme..here I have made a 3"X3" note card to go with this .. using Itsy bitsy forever valentine primed chipis , flowers. Size of my project base is 8"X3" and each letter is 2" tall..and that base is almost 3/4" .
Top view
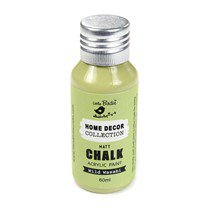
Then using Little birdie chalk Colors I coloured both pieces..and gave polka dots on that ,with little dark color using end of a brush tip.
Then with heavy gel medium..I have stuck everything..in desired place.
Here I thought of using as fridge magnet..later..or I would have inserted magnets in curing time only...
Today I am sharing cement craft project in love theme 😊❤️. When I was told to work on cement craft for my DT project..I was little worried ! what to do with cement?..n how it will work?..but once I got the craft cement box in my hand n watching itsybitsy craft cement video ...ideas started pouring in my head..and then it was so difficult to stop myself😀.. Iam telling you in advance it's very addictive..you just can't stop playing with that😁 l almost used 3 cement boxes.
Here in my project I have used silicon moulds, since I have in many designs as I do soap making n all...but you can use any plastic containers, cartoon boxes, glass bottle etc for your base..just you have to keep your eyes for different shapes n bases...
If you want to see how to use craft cement video..HERE is the link.
Now here is my project..since it's a valentine's week so I am sharing love theme cement project..
NOTE CARD HOLDER IN LOVE THEME:
It's a paper,or note card holder in love theme..here I have made a 3"X3" note card to go with this .. using Itsy bitsy forever valentine primed chipis , flowers. Size of my project base is 8"X3" and each letter is 2" tall..and that base is almost 3/4" .
Top view
Step by step procedure:
I started with craft cement,water in a container..and my alphabet mould..after mixing craft cement n water in desired consistency, I dropped it in required letter moulds and different shapes ..though in pictures you can see I did some extra alphabets ( as I told you earlier..it's very addictive and fun to work with that)😁
Here you can see what other moulds I have used..I played with shell mould aslo..as earlier I planned to use it in my project..but then I changed my mind.
One important thing I must tell you..as here I have used paper clips..so any thing you want inserted inside the craft cement put it in advance as once it dries you can't..and curing of cement takes almost 3/4 days..inbetween I sprinlked little water..also.
Finally when all thing dried properly I decided on LOVE and HOME words and cemented paper clip with a base for the final project.
I did light sanding with sand paper on final cement items
As I wanted to give little color as well wanted to keep cemented look..I decided to color paper clip base and 'O' word in dark pinkish red. so I did gesso on that two only.Then using Little birdie chalk Colors I coloured both pieces..and gave polka dots on that ,with little dark color using end of a brush tip.
Then with heavy gel medium..I have stuck everything..in desired place.
Finally I gave a coat of Matt varnish on two coloured things..not on plain cemented ones..as I liked that look ..and since I have used Matt varnish..it's not looking different then other pieces.🙂 and use little birdie handmade flowers to decorate notecard holder base ( see in final picture)
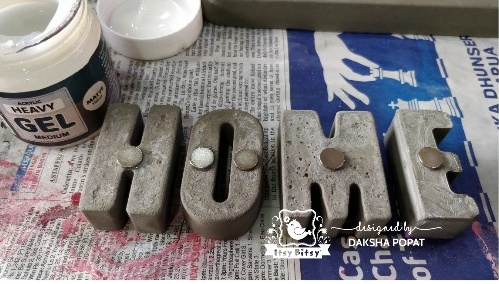
Here on above picture, you can see I have used other alphabet letters and did 'HOME'. it's a fridze magnets I tried..I have used different chalk paints for each letter..and used strong magnets at the back..but not sharing complete project as while handling I broke'O' ..so need to make that again..on HOME word after Coloring i have used glitter paste..and once it dried I gave a coat of Matt varnish.
Here I thought of using as fridge magnet..later..or I would have inserted magnets in curing time only...
Here you can see glittery look.. feeling sad I cannot show you the final picture..but will share it definitely 🙂
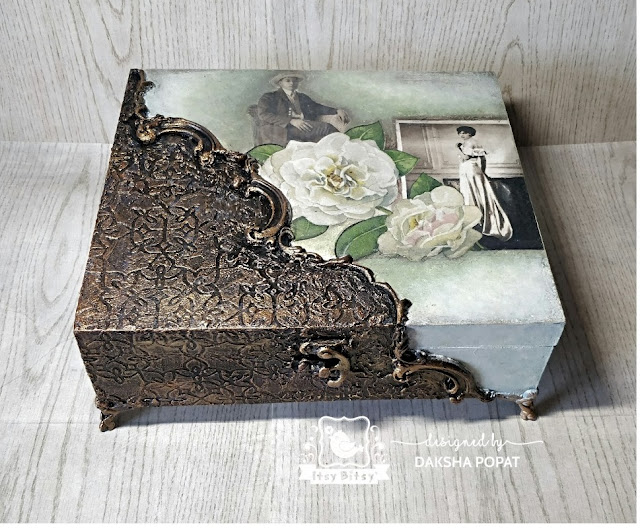
Final project look
Thank you for stopping by..hope you are still with me , and my post is not boring 😀😛
Supplies used:
Note: #Since I don't have little birdie red chalk paint..I mixed fevicryl red in little birdie pink chalk paint...and for darker dots I have used Little birdie Black chalk paint in my red colour mixture ...and that purple also from fevicryl
# I have used silicon moulds in which once cement dries n comes out very easily and we get very smooth finish. And comes out by just pushing from bottom..as it's very soft .


Comments
Post a Comment