Sharing two projects and Tutorial with Papericious March release 2018
Hello friends!
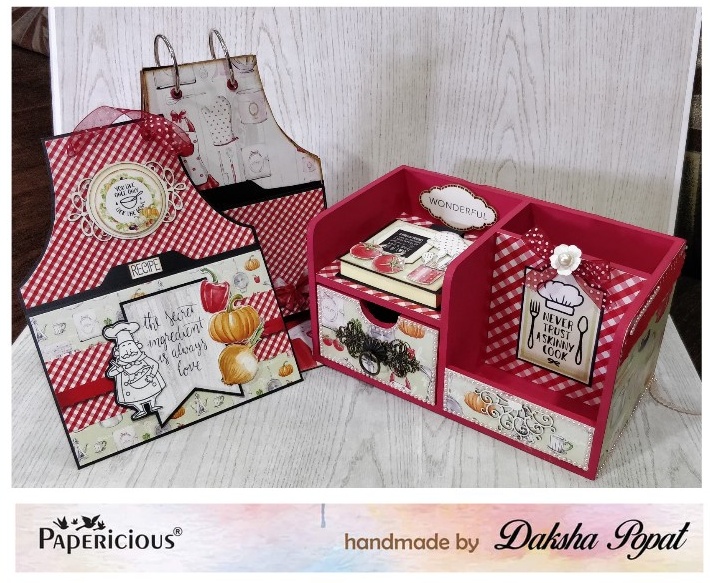
Today I am sharing two projects ..one is Apron style recipe holder with Tutorial and second is mdf desk organiser...
This Apron style recipe holder on your table.. is a very versatile project and using this one template we can create either invitation card, or recipe holder on your table or an Apron shaped mini album with pockets to hold your recipes.
I got this idea from net but as there was an Apron shaped big die was used ..so I made a template similar to that die and here you can see in step by step instructions with pictures to make that template..so you can use it in your choice of project...Let me tell you in advance..Its a picture heavy post so..let's start with template part..for template you can take any cardstock..once you get the perfect template you can create with cardstock or chipboard according to your requirement.
Step:1-take 12"x12" cardstock from that cutout 71/8" x 12"...rest paper you keep to make pocket inserts.
Step:2- on 71/8" side score at 1/2" from both sides..see picture.
Step:3- on 12" side score at 4"
Step:4- cut both sides half-inch score lines till 4"..as in picture
Step:5-now on 61/4" side mark according to picture..
Step:6-now join two side of each corners in curve shape to give Apron shape..
Step:7-now cut to side corners and it will give an Apron shape
Step:8- now stick glue on two 1/2" flaps and lift up n stick to form a pocket..which will hold a recipe insert.( Sorry forgot to take picture so had to do it again so it's in black CS)
Step:9- after stick two 1/2 " sides it will form a pocket ..in which we will put an insert.
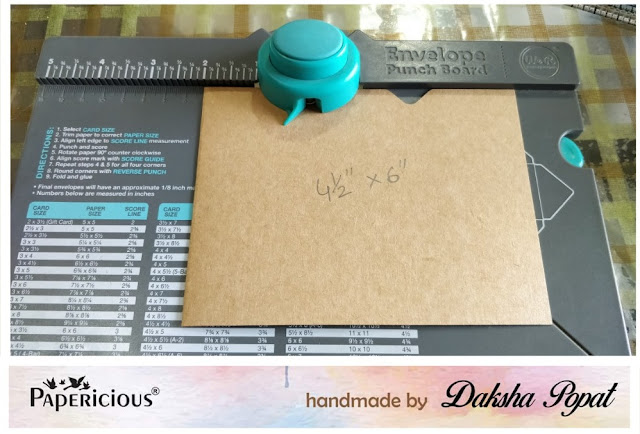
Step :10- for insert take 41/2"x 6" and make a tab on 6" side using We r memory keepers 123 punch board.
Today I am sharing two projects ..one is Apron style recipe holder with Tutorial and second is mdf desk organiser...
This Apron style recipe holder on your table.. is a very versatile project and using this one template we can create either invitation card, or recipe holder on your table or an Apron shaped mini album with pockets to hold your recipes.
Step:1-take 12"x12" cardstock from that cutout 71/8" x 12"...rest paper you keep to make pocket inserts.
Step:2- on 71/8" side score at 1/2" from both sides..see picture.
Step:3- on 12" side score at 4"
Step:4- cut both sides half-inch score lines till 4"..as in picture
Step:5-now on 61/4" side mark according to picture..
Step:6-now join two side of each corners in curve shape to give Apron shape..
Step:7-now cut to side corners and it will give an Apron shape
Step:8- now stick glue on two 1/2" flaps and lift up n stick to form a pocket..which will hold a recipe insert.( Sorry forgot to take picture so had to do it again so it's in black CS)
Step:9- after stick two 1/2 " sides it will form a pocket ..in which we will put an insert.
Step :10- for insert take 41/2"x 6" and make a tab on 6" side using We r memory keepers 123 punch board.
Step:11-after joining two side flap n making insert in punch board..we can put insert in Apron pocket.
Here is the complete picture of my Apron style recipe holder card ...after finishing basic apron shape ..I have used Papericious new release paper kiss the cook and white chippis to decorate it. I have used sentiments sheet from same paper pack n used MFT stamp image without Coloring.
Second project: MDF desk organiser
Here I have used Papericious new march release MDF desk organiser . First I have colored with Papericious chalk color red after drying I have used kiss the cook pattern paper in few places.used sentiment sheet .on drawer front I have used metal charm n handle . Finally decorated using ribbon lace,pearls and MDF white chippis. I have stamp word wonderful on white chippis.. I have made post-it note (decorated with pattern paper, cutouts and white chippis).. to keep on front shelf of desk organiser.
Hope you are still with me🙂..thank you for stopping by..
Love n Hugs
Daksha


Comments
Post a Comment